Why the Raspberry Pi Zero Display Revolutionized My DIY Projects: A Personal Journey and Expert Insights
When I first stumbled upon the Raspberry Pi Zero, I was immediately captivated by its compact size and incredible versatility. It’s a tiny computer that opens up a world of possibilities, and when paired with a display, it transforms into a powerful tool for creativity and innovation. Whether you’re a seasoned developer or just starting your journey into the realm of electronics, the Raspberry Pi Zero display allows for endless experimentation and learning. Imagine crafting everything from a miniature retro gaming console to a sleek digital dashboard or even a portable media center—all from a device that fits in the palm of your hand. In this article, I’ll explore the exciting intersection of the Raspberry Pi Zero and display technology, highlighting the myriad ways you can bring your projects to life and inspire your next great idea. Join me as we delve into the world of possibilities that this remarkable little computer can offer!
I Tried Out the Raspberry Pi Zero Display and Shared My Honest Recommendations Below

Hosyond 3.5 Inch 480×320 Touch Screen TFT LCD SPI Display Panel for Raspberry Pi A, B, A+, B+, 2B, 3B, 3B+,4B,5

1.44inch LCD Display HAT for Raspberry Pi 3B+/3B/2B/3B+/Zero/Zero W,128×128 Pixels SPI Interface RGB, 65K Display Color ST7735S Driver

Hosyond 7 Inch IPS LCD Touch Screen Display Panel 1024×600 Capacitive Screen HDMI Monitor for Raspberry Pi5/Pi4/Pi3/ZERO W, BB Black, Windows 10 8 7
iUniker 3.5 Inch Touchscreen for Raspberry Pi Zero With Backlight Knob – 60+ FPS, 480×320 Resolution, High Speed Screen for Pi Zero W 2/W/1.3
1. Hosyond 3.5 Inch 480×320 Touch Screen TFT LCD SPI Display Panel for Raspberry Pi A, B, A+, B+, 2B, 3B, 3B+,4B,5
I recently came across the Hosyond 3.5 Inch 480×320 Touch Screen TFT LCD SPI Display Panel designed specifically for Raspberry Pi users, and I must say, it has piqued my interest. As someone who loves tinkering with Raspberry Pi projects, I understand the importance of having a reliable and user-friendly display. This product promises to deliver a clear and responsive touch interface, making it an excellent addition for both beginners and seasoned Raspberry Pi enthusiasts alike.
The 3.5-inch size of the display strikes a perfect balance between being compact and functional. With a resolution of 320×480, the screen offers vibrant colors and sharp visuals, which is crucial when working on projects that require precision. Whether I am coding, creating a home automation dashboard, or even a simple gaming project, having a clear display ensures that I can see everything without squinting or straining my eyes. The touch screen feature is particularly exciting, as it allows for intuitive navigation and interaction with various applications – no need for an external mouse or keyboard.
One of the standout features of the Hosyond display is that it requires no external power supply. This is a significant convenience for me, as it simplifies the setup process. I simply plug it into the Raspberry Pi board and follow the provided driver installation tutorial to get started. The ease of installation is a huge plus, especially for those who may not be very tech-savvy. I appreciate that the manufacturer has included a tutorial, making it easier for users to get their display up and running without any hassle.
The compatibility of this display with various Raspberry Pi models, including the latest Pi 5 and earlier versions, is another reason I find this product appealing. It also supports multiple operating systems, such as Raspbian, Ubuntu, and Kali Linux. This means that no matter which Raspberry Pi project I embark on, I can rely on this display to work seamlessly across different setups. This versatility makes it a fantastic investment for anyone looking to expand their Raspberry Pi toolkit.
What I find particularly reassuring is the commitment to customer support provided by Hosyond. Knowing that I have access to technical support if I encounter any issues gives me peace of mind. The inclusion of a touch pen and project s, along with code and tutorials, means that I won’t be left in the dark if I want to explore new projects. This comprehensive support structure is essential for fostering a positive user experience and encourages experimentation.
In summary, the Hosyond 3.5 Inch 480×320 Touch Screen TFT LCD SPI Display Panel is a fantastic product for anyone involved with Raspberry Pi. Its clear display, touch functionality, easy setup, and robust compatibility make it a standout choice. With the added bonus of technical support and a wealth of resources for project ideas, I can confidently say that this display is worth considering for your next Raspberry Pi endeavor. If you’re looking to enhance your projects and streamline your setup, I would highly recommend giving this display a try. You won’t be disappointed!
Feature Description Screen Size 3.5 inches Resolution 320×480 Display Type TFT LCD Resistive Touch Screen Power Requirement No external power supply needed Compatibility Raspberry Pi A, B, A+, B+, 2B, 3B, 3B+, 4B, 5 Operating Systems Raspbian, Ubuntu, Kali Linux, and more Included Items Touch screen, Touch pen, Project , Code and tutorial Technical Support Available for troubleshooting
Get It From Amazon Now: Check Price on Amazon & FREE Returns
2. 1.44inch LCD Display HAT for Raspberry Pi 3B+/3B/2B/3B+/Zero/Zero W,128×128 Pixels SPI Interface RGB, 65K Display Color ST7735S Driver
As a tech enthusiast and someone who enjoys experimenting with Raspberry Pi projects, I am genuinely excited about the 1.44inch LCD Display HAT. This product is not just a display; it’s a versatile addition to any Raspberry Pi setup, particularly for those who love creating interactive applications. With its 128×128 pixel resolution and vibrant 65K color support, it opens up a world of possibilities for visual output. The compact size of 1.44 inches makes it perfect for smaller projects or for integrating into larger systems without taking up too much space.
The SPI interface for communication is a significant advantage, as it ensures quick data transfer between the display and the Raspberry Pi. This makes it ideal for real-time applications, where display responsiveness is crucial. The compatibility with multiple Raspberry Pi models, including the 2B, 3B, 3B+, Zero, and Zero W, means that I can use this HAT across various projects without worrying about compatibility issues. The direct-pluggable feature also simplifies the setup process, allowing me to dive straight into my projects without a lengthy installation process.
One of the standout features of this display is the embedded ST7735S driver. This driver is well-known for its reliability and performance in driving small LCD screens, which gives me confidence that the display will function seamlessly. Additionally, the integrated joystick and push buttons add an extra layer of interactivity to my projects. I can easily navigate menus or control applications directly from the display, enhancing the overall user experience. This is particularly beneficial for creating gaming interfaces or control panels.
The backlight feature is another excellent touch. It ensures that I can view the display in various lighting conditions, which is essential when I’m working on projects outdoors or in brightly lit environments. Operating at a voltage of just 3.3V, it is power-efficient, which is always a plus for me, especially when I’m working on portable projects that run on battery power.
Furthermore, the availability of an online user manual is a significant help for anyone who may be new to using displays with Raspberry Pi. It provides a clear guide on how to set up and utilize the display effectively, making it accessible for both beginners and advanced users. Knowing that I have resources available for troubleshooting or enhancing my projects gives me peace of mind.
Feature Description Display Size 1.44 inches diagonal Resolution 128×128 pixels Color Depth 65K colors Interface SPI Driver ST7735S Backlight LED Operating Voltage 3.3V Interactive Controls 1 joystick (5-position), 3 push buttons User Manual Available online at //bit.ly/3MBLbRd
the 1.44inch LCD Display HAT is an excellent investment for anyone involved in Raspberry Pi projects. Its compact size, vibrant display, and interactive features make it a valuable tool for both hobbyists and professionals. If you’re looking to enhance your Raspberry Pi experience, I highly recommend considering this display. It’s not just a purchase; it’s an opportunity to elevate your projects and bring your ideas to life in a visually engaging way. Don’t miss out on the chance to add this fantastic display to your toolkit!
Get It From Amazon Now: Check Price on Amazon & FREE Returns
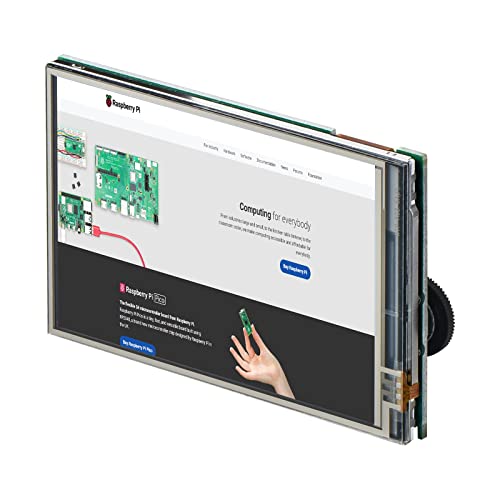
3. Hosyond 7 Inch IPS LCD Touch Screen Display Panel 1024×600 Capacitive Screen HDMI Monitor for Raspberry Pi5/Pi4/Pi3/ZERO W, BB Black, Windows 10 8 7
As a tech enthusiast, I am always on the lookout for gadgets that can enhance my computing experience. The Hosyond 7 Inch IPS LCD Touch Screen Display Panel is a standout product that immediately caught my attention due to its impressive features and versatility. This display is designed not just for Raspberry Pi enthusiasts but also for anyone looking for a reliable and high-quality monitor that can serve multiple functions. With a resolution of 1024 x 600, it offers a crisp and clear visual output that is perfect for coding, gaming, or simply browsing the web.
One of the most appealing aspects of this display is its capacitive touch screen functionality, which supports up to five-point touch. This feature makes interaction much more intuitive and responsive compared to traditional monitors. Whether I’m playing games, navigating through software, or using it for programming tasks, the touch responsiveness enhances the overall experience. It’s great to know that I can use this as a direct input device, making it not just a passive display but an interactive tool.
The versatility of the Hosyond display is truly remarkable. It supports various platforms, including Raspberry Pi models (from Pi5 to ZERO W), BB Black, and other mini PCs, making it a fantastic choice for developers and hobbyists alike. Moreover, it can also function as a general-purpose HDMI monitor. This means I can easily connect it to my computer and use it as a secondary display, which is incredibly useful for multitasking or expanding my workspace. The fact that it supports Windows 10, 8, and 7 systems ensures that I can seamlessly integrate it into my existing setup without the hassle of additional drivers. It’s truly plug-and-play!
Another feature that stands out to me is the backlight control. The ability to turn off the backlight not only extends the life of the display but also saves power, which is a significant advantage for those who are conscious about energy consumption. This small but thoughtful feature reflects the design philosophy behind the product—functionality without sacrificing efficiency.
In terms of software compatibility, the display supports a wide range of operating systems, including Raspbian, Ubuntu, Kali-Linux, Kodi, and even Windows 10 IoT. This broad compatibility makes it an excellent choice for tech enthusiasts who enjoy experimenting with different systems. The absence of a need for drivers simplifies the setup process, allowing me to focus on what really matters—my projects and tasks.
To summarize, the Hosyond 7 Inch IPS LCD Touch Screen Display Panel is an exceptional product that combines functionality, versatility, and user-friendliness. Whether I’m using it for my Raspberry Pi projects, as a secondary monitor for my computer, or even as a standalone device for various applications, it consistently delivers a great performance. For anyone considering a touch screen display that ticks all the boxes, I highly recommend this product. Its features and adaptability make it an excellent investment that can enhance both work and play.
Feature Description Size 7-inch IPS LCD Resolution 1024 x 600 (hardware), Up to 1920 x 1080 (software) Touch Capability Capacitive touch, maximum 5-point touch Compatibility Raspberry Pi (all models), BB Black, Banana Pi, general HDMI monitor Operating Systems Supported Raspbian, Ubuntu, Kali-Linux, Kodi, Windows 10/8/7 Backlight Control Can be turned off to save power
With all these impressive features combined, I genuinely believe that this display can cater to a wide range of users—from hobbyists to professionals. So, if you’re in the market for a compact, high-quality touch screen monitor, look no further than the Hosyond 7 Inch IPS LCD Touch Screen Display Panel. It’s an investment that I am confident you won’t regret!
Get It From Amazon Now: Check Price on Amazon & FREE Returns
4. iUniker 3.5 Inch Touchscreen for Raspberry Pi Zero With Backlight Knob – 60+ FPS, 480×320 Resolution, High Speed Screen for Pi Zero W 2/W/1.3
As a tech enthusiast, I am always on the lookout for innovative products that enhance my experience with Raspberry Pi devices. Recently, I came across the iUniker 3.5 Inch Touchscreen for Raspberry Pi Zero, and I must say, it has left me quite impressed. This compact touchscreen is designed specifically for the Raspberry Pi Zero series, including the Zero W, W 2, and even the older 1.3 model. With its 480×320 resolution and the capability of 60+ frames per second, this touchscreen monitor proves to be a game changer for anyone looking to elevate their Raspberry Pi projects.
One of the standout features of this touchscreen is its high-speed performance. The 60+ frames per second (fps) capability ensures that everything from gaming to application navigation is smooth and responsive. I can imagine how this feature would enhance my projects, making them not only visually appealing but also enjoyable to interact with. Whether I’m creating a DIY arcade machine, a portable media center, or a smart home controller, having a high-speed touchscreen like this one would significantly improve the overall user experience.
Moreover, the 480×320 Super HD resolution offers vibrant colors and clear images, which is essential for any display. I appreciate that the touchscreen is specifically designed to fit seamlessly with the Raspberry Pi Zero WH and W models. This compatibility means I won’t have to worry about additional modifications or adjustments, allowing me to focus more on my project rather than on setup hassles. The inclusion of a backlight knob is another thoughtful touch, providing me with the flexibility to adjust brightness based on my environment, whether I’m working indoors or outdoors.
The compact size of the iUniker touchscreen makes it a portable monitor that I can easily take with me wherever I go. This is particularly appealing to me as someone who enjoys tinkering with tech on the move. Whether I’m at a friend’s house showcasing my latest project or attending a tech meet-up, this touchscreen is lightweight and easy to transport. It’s a great addition to my toolkit, allowing me to demonstrate my Raspberry Pi projects with ease and flair.
Another noteworthy aspect is the customized circuit board designed for this 3.5-inch touchscreen. It ensures that the integration with the Raspberry Pi Zero is seamless, providing me with a hassle-free experience. Knowing that the product is tailored specifically for these models gives me confidence in its performance and reliability. However, it’s important to note that this touchscreen is designed exclusively for the Raspberry Pi Zero series; it won’t fit other Raspberry Pi models, so I need to keep that in mind when making my purchase.
In summary, the iUniker 3.5 Inch Touchscreen for Raspberry Pi Zero offers an impressive combination of features that can significantly enhance my Raspberry Pi experience. Its fast performance, high-resolution display, portability, and easy integration make it an excellent investment for anyone passionate about Raspberry Pi projects. If you’re looking to upgrade your setup and take your projects to the next level, I highly recommend considering this touchscreen. It’s a small investment for a big leap in functionality and enjoyment.
Feature Description Screen Size 3.5 inches Resolution 480×320 (Super HD) Frame Rate 60+ FPS Compatibility Raspberry Pi Zero WH / Zero W / Zero W 2 Portability Lightweight and easy to transport Backlight Knob Adjustable brightness
Get It From Amazon Now: Check Price on Amazon & FREE Returns
How Raspberry Pi Zero Display Has Helped Me
As someone who loves to tinker and explore new tech, my Raspberry Pi Zero Display has become an invaluable tool in my personal projects. One of the most significant ways it has helped me is by providing a compact and cost-effective solution for creating custom display interfaces. Whether I’m building a digital dashboard for monitoring my smart home devices or a simple weather station, the versatility of the Raspberry Pi Zero combined with a display allows me to bring my ideas to life without breaking the bank.
Moreover, the ease of use and the vast community support surrounding Raspberry Pi has been a game changer for me. I can quickly find tutorials and forums that guide me through complex setups, making it much easier for me to learn as I go. This has not only boosted my confidence in programming and electronics but has also sparked my creativity, leading me to explore new projects that I would have never considered before.
Another personal benefit I’ve experienced is the hands-on learning opportunity that the Raspberry Pi Zero Display provides. It has deepened my understanding of coding, hardware integration, and even basic design principles. Each project I undertake teaches me something new, whether it’s learning to code in Python or understanding how to interface sensors with the display. This continuous learning
Buying Guide for Raspberry Pi Zero Display
Understanding My Needs
When I first decided to integrate a display with my Raspberry Pi Zero, I had to think about what I really needed. I considered the projects I wanted to undertake, whether it was a simple interface for a DIY project or a more complex setup. Understanding my requirements helped me narrow down the options.
Display Size Considerations
The size of the display was a crucial factor for me. I wanted something compact yet readable. I found that smaller displays, typically between 2.5 to 5 inches, worked best for portable projects. However, if I aimed for a more stationary setup, I might have opted for a larger screen to enhance visibility.
Resolution Matters
Resolution is another aspect I paid attention to. I realized that a higher resolution display provided clearer images and text. For my purposes, I found that a resolution of 800×480 pixels was often sufficient for most applications, but I kept in mind that higher resolutions could enhance the user experience.
Touchscreen vs. Non-Touchscreen
I had to decide between a touchscreen and a non-touchscreen display. A touchscreen offered more interactivity, which was appealing for my projects. However, I considered how much I would actually use this feature. In the end, I leaned towards a touchscreen for its versatility.
Connection Types
The connection method was something I had to research thoroughly. I learned that HDMI and GPIO connections were common for Raspberry Pi displays. I preferred HDMI for its ease of use, but I also explored GPIO options for more compact setups. Understanding the connection type helped me prepare the necessary cables and adapters.
Power Supply Requirements
I discovered that power supply considerations are essential when choosing a display. Some displays could be powered directly from the Raspberry Pi, while others required an external power source. I made sure to check the power requirements to avoid any compatibility issues.
Durability and Build Quality
The durability of the display was another important factor. I wanted to ensure that the display could withstand regular use, especially if I planned to transport my Raspberry Pi projects. I looked for displays with solid build quality and good reviews regarding their longevity.
Compatibility with Raspberry Pi Zero
Ensuring compatibility with the Raspberry Pi Zero was non-negotiable for me. I researched whether the display I was considering had any specific requirements or limitations when connected to the Pi. This helped me avoid any potential headaches during setup.
Budget Considerations
Finally, I had to consider my budget. I found that displays can vary significantly in price based on size, resolution, and features. I set a budget range that aligned with my project goals and sought displays that offered the best value for my investment.
Final Thoughts
After evaluating all these factors, I felt more equipped to choose the right Raspberry Pi Zero display for my projects. Each element played a role in shaping my decision, and I was excited to see how my projects would come to life with the display I selected.
Author Profile
-
Hi, I’m María Hirsch. I’m a proud daughter of Mexican immigrants, raised with the kind of resilience that only comes from living both sides of a border and dreaming past it. I spent my early childhood in Los Angeles before my family moved to Tecate, Mexico, after my father a hardworking gardener suffered an injury that made staying in L.A. impossible. Like many families before us, we found a way. My siblings and I commuted across the border daily to attend school in East San Diego County, driven by my parents’ one wish: that we go to college.
In 2025, I took a new step. Alongside my continued community work, I began writing an informative blog focused on personal product analysis and first-hand usage reviews. After years of helping families navigate systems from school enrollment to public services I realized how often people, especially parents, are left overwhelmed when trying to choose what’s right for their homes, health, and children. I wanted to bridge that gap.
Latest entries
- April 20, 2025Personal RecommendationsWhy I Switched to LED Lights for My Truck Running Boards: A Game-Changer for Safety and Style
- April 20, 2025Personal RecommendationsTransforming My Kitchen: My Expert Experience with a Spice Organizer for Pull-Out Skinny Cabinets
- April 20, 2025Personal RecommendationsWhy I Switched to a Heat Light for My Tortoise: An Expert’s Guide to Optimal Care
- April 20, 2025Personal RecommendationsWhy I Chose a 7-Piece Bedding Set for My King Size Bed: A Game-Changer in Comfort and Style